How to add a product to your online shop using Woocommerce and WordPress
Learn how to add a product to your online shop. Woocommerce is an easy-to-use e-commerce platform that allows you to add and manage products on your website. You can easily create new products, duplicate existing ones, manage your inventory and check all your orders using this plug-in.
Add a new product
Add a new product
To add a new product in Woocommerce, simply go to the menu on the left hand side of your admin dashboard, click on Products and then click on Add New.
A page will open with a number of fields that you can populate. The product name is the first field. Enter The name of your product here. In the next field add a full description of your product. You can enter all the information about your product here including things like variations, sizes, flavours and other information the customer will find useful.
The next set of fields are the product data to capture information like price, stock and shipping information depending on the type of product.
Woocommerce allows you to add simple, grouped, variable and other types of products. For this demonstration we’re just going to add a simple product so you can leave this dropdown as it is. Below this there are a set of tabs labelled:
- General
- Inventory
- Shipping
- Linked products
- Attributes
- Variations (only visible with Variable products
- Advanced
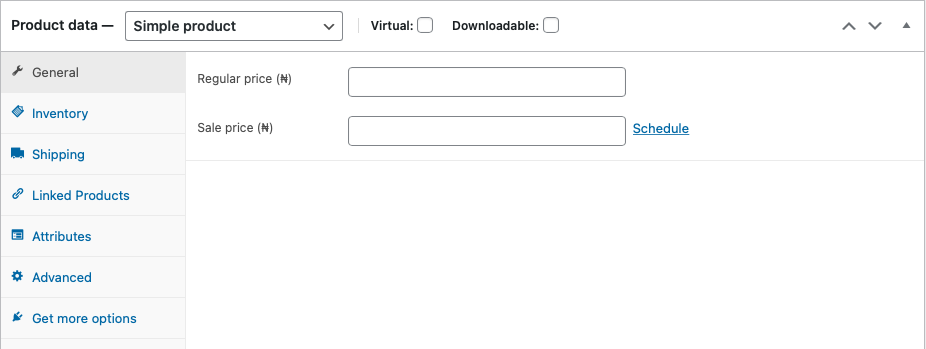
Enter a price in the standard price field. In the next field you can enter the sale price this will show on the website by default along with a “sale” badge on the product image. If you only want to display the sale price at a particular time, click on the schedule link below it and choose your start and end dates.
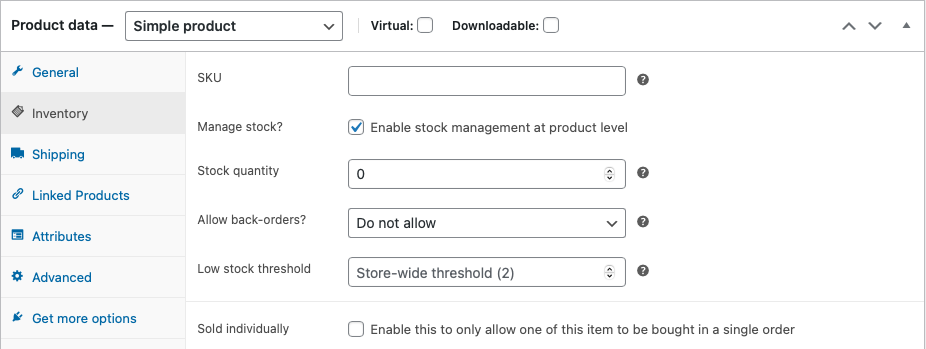
If you want to manage your inventory on the site you can click on the inventory tab. Enter your product code in the SKU field. To manage stock at the product level, check the manage stock box. Now enter the stock quantity and choose if you want customers to be able to order when you are out of stock.
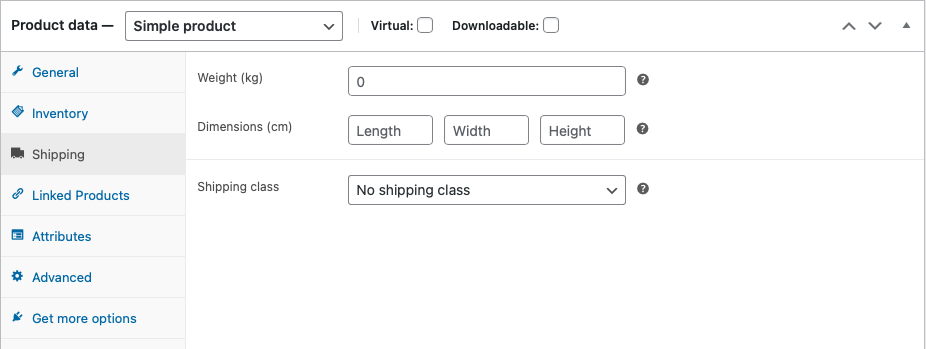
The shipping tab allows you to enter details such as the weight and dimensions and shipping class of the product. This will allow you to have shipping information displayed alongside the product and it will help you calculate the shipping costs so you can bill your customer accordingly. The shipping class and units of measurement can be set up in Woocommerce Settings.
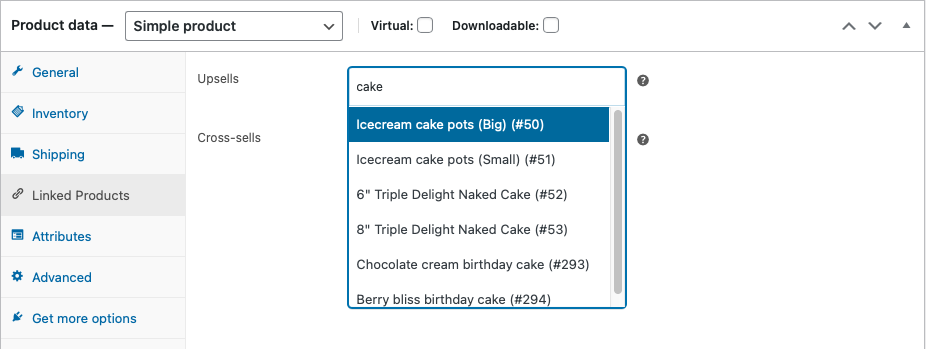
Linked products can be used to select cross-sells and upsells. For example, if the product you are adding is a cake and you also sell candles, you can add that product as a cross-sell so it shows up in the basket as a recommended add-on. The upsells are products that may be more costly or profitable that you want to promote as an alternative product to the current one.
Click in either field and start typing a product name. A list of products with the characters you type will appear in the drop-down and you can then select the ones you want to include.
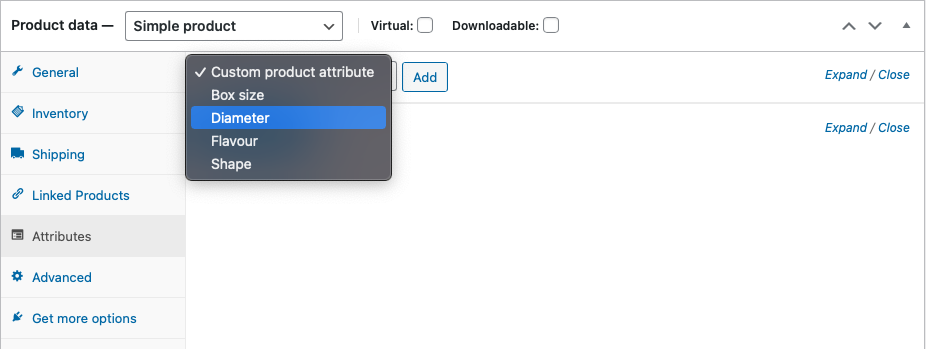
Attributes allow you to add properties to your product such as colour, pack size, flavours and such. You can then use these attributes to display different prices for each variation of your product based on its attributes.
You can add custom product attributes for individual products or set global product attributes by going to the Attributes option under the Products menu.
To select a global attribute click on the drop-down for Custom product attribute and choose one, then click the Add button.
Select terms to describe the attribute by clicking in the field then selecting the ones you want to use. You can select all by clicking the Select All button if you want to use all the terms.
Check the Visible on the product page box to display the attributes to the customer as a drop-down menu.
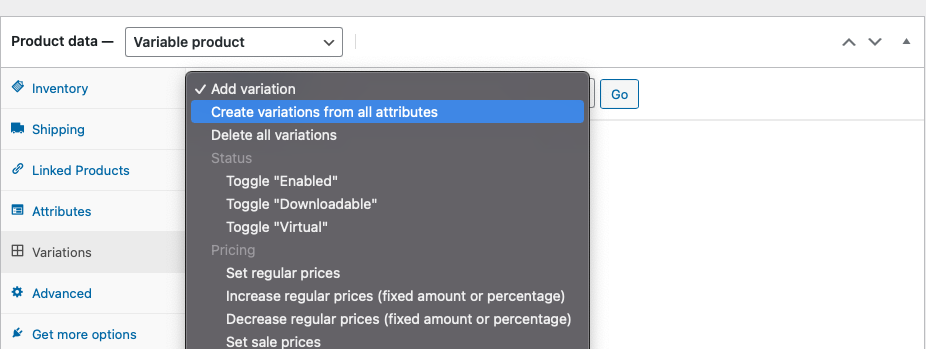
To display different prices you will need to change your product from a simple product to a variable product then select the checkbox that says Used for variations. This will add a new tab called Variations to the product data panel.
Click on the Add variation drop-down and choose: Create variations from all attributes. This will create a number of sub-products so you can add different prices, descriptions and images for each variation. A warning will pop up that the action may create a large number of sub-products. Click OK if you are happy with this.
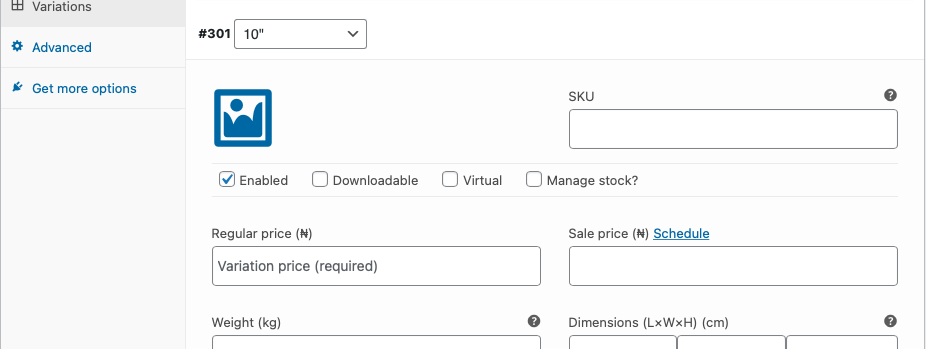
You can expand each variation to add custom details to each. If you don’t add a price, the variation will not be shown.
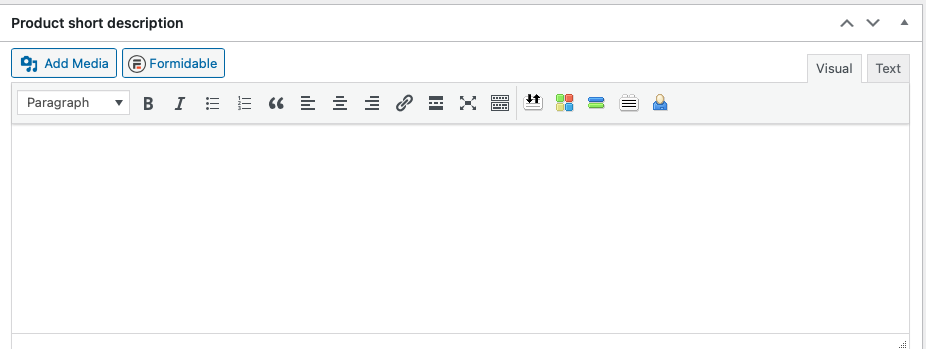
The other field to enter over your product description this description shows up in search results and on the listing pages so make it catchy, succinct and descriptive.
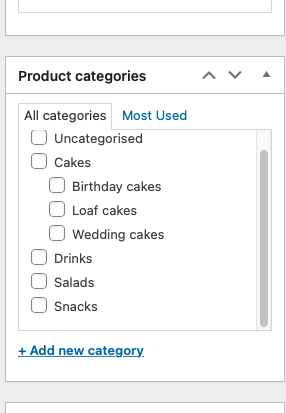
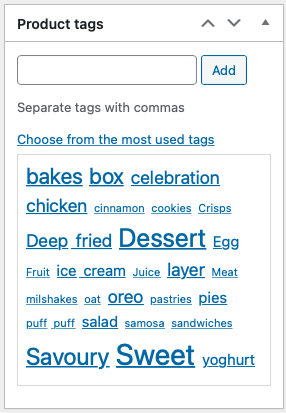
To choose a product tag you can click on the link that says choose from most used tags. It’ll show you a list of tags that have been used already with texts that are most used displayed at a larger size. Click on the tags you wish to assign to your product. You can use as many tags as you wish but we recommend using only six.
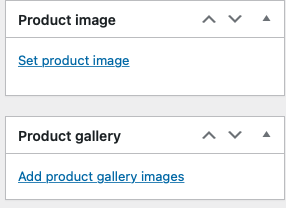
Now click on the product image link that says Set product image. This will open the media library where you can choose an existing product image or upload one from your computer. We recommend that you use the same size and aspect ratio for all your product images to give your website a consistent look and feel.
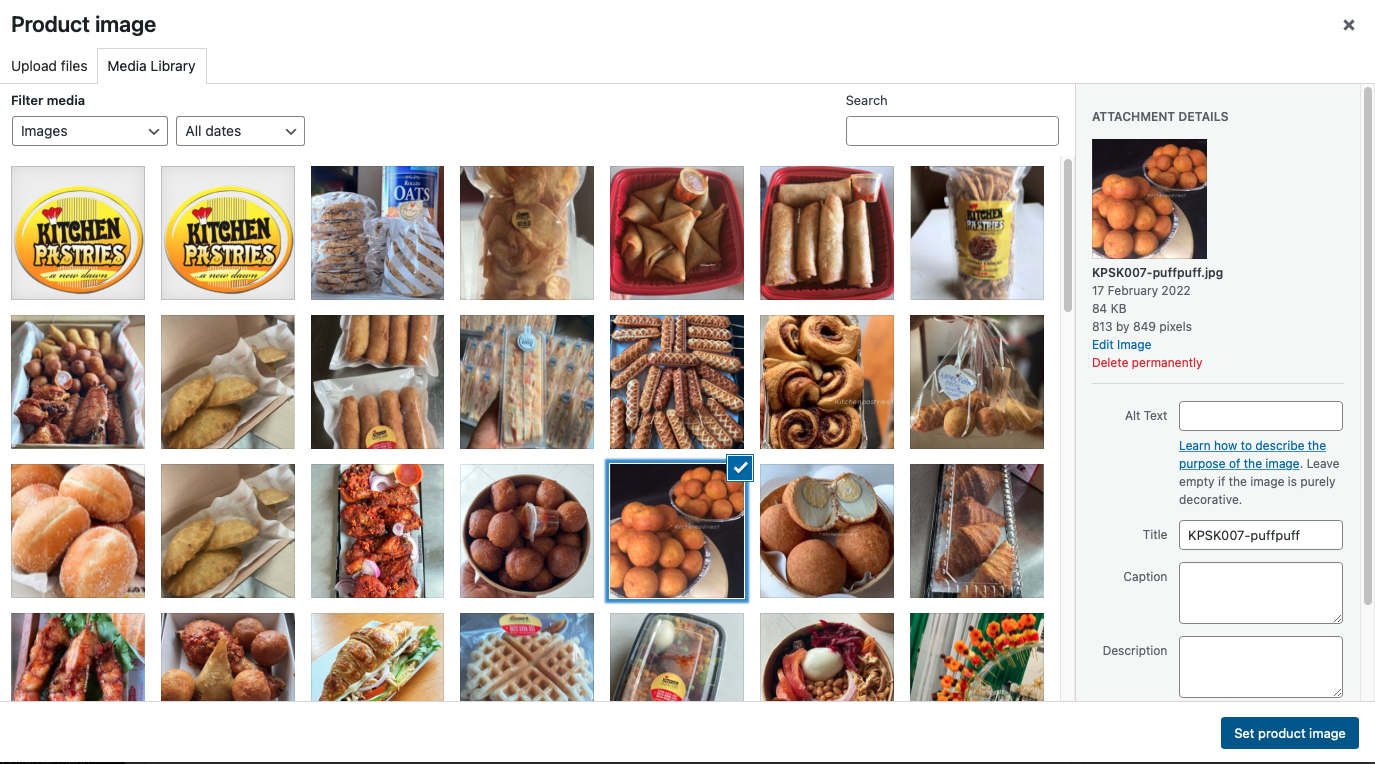
If you would like to display multiple images you can add extra images by clicking on the link in the product gallery that says Add product gallery images. This will allow you to choose multiple images for your products so that customers can see different options or angles for your product. Once you have done all this you can then click on the blue Publish button and your product will now be live on your website.
Other websites we’ve designed

Trinity Towers
The challenge was to design and build a showcase website for a new mixed-use development in Lekki, Lagos, Nigeria. The site would include video and technical information to help support the marketing of the development.
Ubosi Eleh + Co
The client wanted a redesign of their existing website without losing the valuable information they already had online. The site would also allow them to post new properties on the site and market them to potential clients.
This Can Happen
The client wanted a website that would plug into multiple CRM platforms like HubSpot and Mailchimp. They also needed to allow for multiple payment systems to sell tickets from their website.


